
Yes, you can install fence panels yourself. With the right tools, materials, and preparation, DIY installation of fence panels is achievable for many homeowners. Just make sure to follow proper guidelines and safety measures during the installation process.
DIY Fence Installation | 7 Step Guide on How to Build a Fence
Thinking about installing a fence but unsure if you should go the DIY route? With the right tools, guidance, and a bit of determination, you can transform your property’s boundaries without breaking the bank.
Benefits of DIY Fence Installation
Embarking on a DIY fence installation project offers numerous advantages. Firstly, you can save money that would otherwise go towards labor costs. By tackling the installation yourself, you can allocate those funds elsewhere. Completing the project independently provides a sense of accomplishment and personal satisfaction.
Customization is another key benefit of DIY fence installations. You have the freedom to tailor the design to meet your specific requirements and aesthetic preferences. Whether it’s choosing the materials, height, or style, you are in full control of the outcome.
- Save money on labor costs
- Gain a sense of accomplishment
- Customize the fence design to fit your needs
1. Planning Your DIY Fence Installation
To kick off your diy fence project, start by creating a comprehensive plan that outlines the fence installation process. Consider factors like the fence perimeter, desired privacy, and the overall aesthetic you wish to achieve with your wood fence.
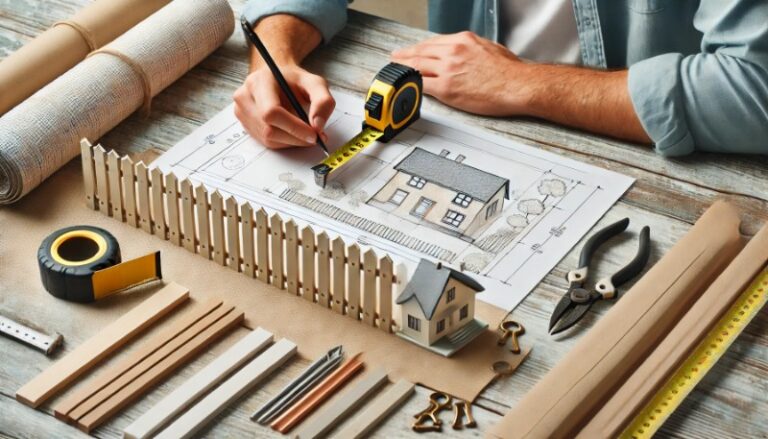
Begin by measuring the area where the privacy fence will be installed. Take accurate measurements to determine the amount of fence material required. This step is crucial in ensuring you purchase the correct quantity of materials for your new fence.
Next, select the appropriate fence type based on your preferences and needs. Whether it’s a beautiful wood fence for a rustic look or a sturdy metal fence for added security, choose a style that complements your property.
When planning your affordable fencing options, set a realistic budget that covers all expenses, including materials and tools. Research different fence styles and materials to find cost-effective solutions without compromising on quality.
Establish a timeline for your project, considering factors like weather conditions and your availability. Setting a clear schedule will help you stay on track and ensure the timely completion of your wood fencing project.
2. Understanding Local Regulations
Before beginning your DIY fence installation, it is crucial to understand and comply with local regulations. Researching zoning laws can help you avoid fines and ensure your fence meets all necessary codes. Obtain permits from the local authorities to legally proceed with the installation process.
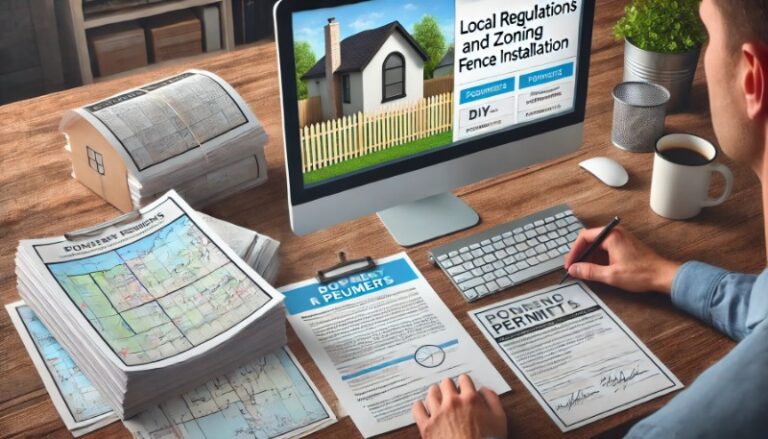
Consulting with your neighbors is also essential. Address any concerns they may have regarding the fence location or height to maintain positive relations. Informing them about your plans can prevent disputes in the future.
When installing a fence, consider reaching out to the utility company to identify any underground lines that may interfere with the installation. This proactive step can prevent accidents and costly damages during the project.
Remember that each location may have specific requirements for fence installations. By adhering to these regulations, you can ensure a smooth and hassle-free process while avoiding potential setbacks.
3. Measuring and Laying Out Fence Posts
Accurately measuring the distance between fence posts is crucial for a sturdy installation. Use tools like a tape measure to ensure each post is spaced correctly. Plan for any slopes or terrain irregularities by adjusting the post placement accordingly.

When laying out the fence line, consider the height of the fence posts based on the type of fence you are installing. Documenting the layout with measurements and markings helps avoid confusion during the installation process. This step ensures that each post is placed at the correct spot.
For precise measurements, use inches or feet depending on the scale of your project. Ensure each post is securely placed in the ground to support the fence structure effectively. By following these steps, you can lay out your fence posts accurately and efficiently.
- Use accurate measuring tools
- Plan for slopes or irregularities
- Document the layout for clarity
4. Digging and Setting Fence Posts
When digging holes for fence posts, consider using an auger for efficiency. Ensure the holes are deep enough for stability, especially in windy areas. Use a level to check the vertical alignment of each post as it is set.
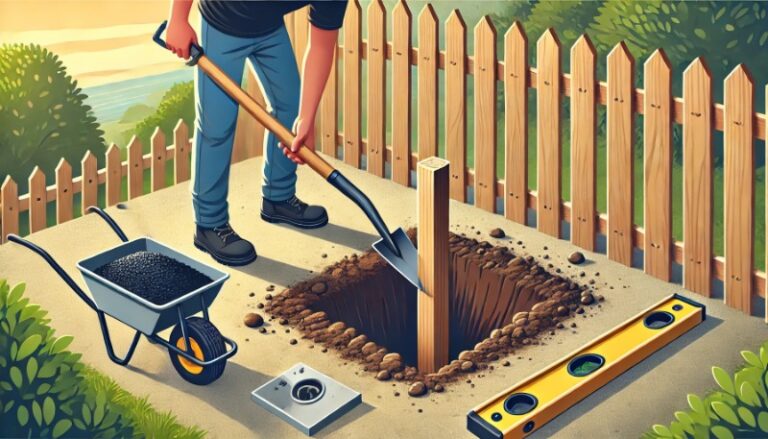
To start, dig holes for the posts at least one-third the height of the fence plus an extra 6 inches to provide stability. The depth also depends on the frost line in your area to prevent shifting.
After digging, place the posts in the holes ensuring they are plumb and level. Pour concrete around the base of each post for added strength and support. Tamp down the concrete to remove air pockets.
For wooden fences, ensure that the posts are treated or naturally resistant to decay. This helps prolong the lifespan of your fence, reducing maintenance needs over time.
When setting metal fencing, make sure to use galvanized posts to prevent rusting and corrosion. Secure them firmly in the ground to withstand pressure and maintain durability.
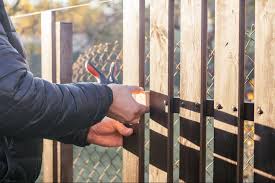
5. Attaching Rails or Panels
Select the appropriate panels or rails based on the fence design to ensure a cohesive look. Different styles and types are available to suit various preferences and needs. Consider factors like durability and aesthetics when choosing between materials like wood, vinyl, or metal.

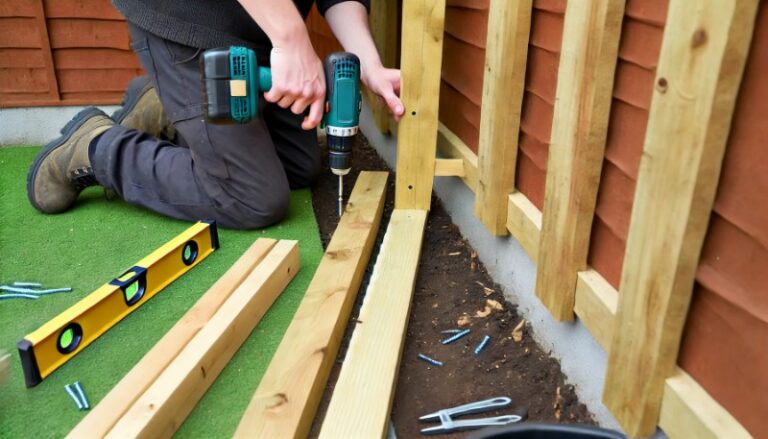
To attach the rails or panels, follow a systematic approach to maintain consistency throughout the fence. Use tools such as a line or string line to keep the installation straight and level. Secure the components using screws, nails, or brackets depending on the fence type.
Regularly inspect the connections during installation to uphold the fence’s structural integrity. Make adjustments as needed to prevent sagging or misalignment. For chain link fences, ensure that the mesh is taut and properly attached to the framework for stability.
Pros:
- Offers flexibility in design choices.
- Allows for easy customization based on specific requirements.
Cons:
- May require additional maintenance over time.
- Some materials can be more expensive than others.
6. Installing Pickets and Post Caps
To achieve an aesthetically pleasing and functional fence, decide on the spacing between pickets carefully. This decision impacts both the visual appeal and privacy of your outdoor space. Ensure that the pickets are evenly spaced for a professional finish.

When it comes to securing the pickets, use appropriate fasteners to prevent any movement or warping over time. By securely fastening each picket, you guarantee the durability and longevity of your fence. Choose screws or nails that are suitable for outdoor use to withstand weather conditions.
For an added touch of style and sophistication, consider adding decorative post caps to your fence. These caps not only enhance the overall appearance but also provide protection for the posts against moisture and other elements. Select post caps that complement the design of your fence for a cohesive look.
- Proper spacing between pickets enhances visual appeal and privacy
- Securely fasten each picket to prevent movement or warping
- Decorative post caps add style and protect posts from elements
7. Staining or Treating the Wood
After installing pickets and post caps, the next crucial step in DIY fence installation is staining or treating the wood. Choose a high-quality stain or treatment specifically designed to protect the wood from weather damage. Look for products that offer UV protection and water resistance to ensure long-lasting durability.
When applying the stain or treatment, make sure to do so evenly across all surfaces of the wood. This ensures full coverage and helps extend the lifespan of your fence. Use a brush, roller, or sprayer for an even application, depending on the product’s recommendations.
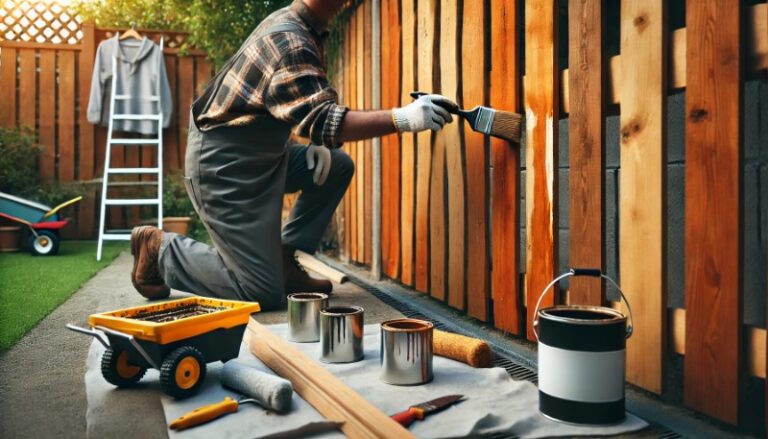
Regular maintenance checks are essential to keep your fence in top condition. Schedule routine inspections to assess the wood’s condition and determine if it needs a fresh coat of stain or treatment. By maintaining your fence regularly, you can prevent issues such as rot, mold, and warping, prolonging its lifespan.
Key Points:
- Choose a high-quality stain with UV protection and water resistance.
- Apply the stain evenly using a brush, roller, or sprayer.
- Schedule regular maintenance checks to reapply stain as needed.
Pros and Cons of DIY vs Professional Installation
DIY fence installation offers cost savings but may lead to mistakes and rework, impacting the overall quality. Professionals, on the other hand, ensure precision and expertise.
For a DIY project, time commitment is crucial. You need to allocate sufficient time for planning, executing, and troubleshooting potential issues. In contrast, professionals can complete the installation efficiently.
Assess your skill level before deciding between DIY or professional installation. DIY requires basic carpentry skills and comfort with tools. Professionals bring years of experience and specialized equipment.
Pros of DIY Installation:
- Cost-effective
- Personal satisfaction in completing the project
Cons of DIY Installation:
- Potential mistakes leading to rework
- Time-consuming due to lack of expertise
Closing Thoughts
Ready to take on your DIY fence installation? Start planning your project today with the confidence that you can build a beautiful, functional fence on your own. If you need professional advice or find yourself in need of expert help, don’t hesitate to reach out to Fairfax Fence. Our team is here to support you every step of the way—whether you’re looking for tips, materials, or a full installation service. Contact us now to get started on transforming your property!
Frequently Asked Questions
What is the easiest fence to install yourself?
The easiest fence to install yourself is typically a vinyl fence. Vinyl fences are lightweight, easy to assemble, and require minimal maintenance compared to other types of fences.
Can you put up a fence by yourself?
Yes, it is possible to put up a fence by yourself. With the right tools, materials, and a clear plan, you can successfully install a fence on your own. Just make sure to follow all safety precautions and local regulations.
Is it cheaper to put up your own fence?
Yes, putting up your own fence can be cheaper if you have the right tools, materials, and follow safety precautions and local regulations.
Can you install fence panels yourself?
Can I build a fence without digging post holes?
Yes, you can build a fence without digging post holes by using alternative methods such as surface mounting, concrete blocks, or ground spikes. These options allow you to secure the fence posts without the need for traditional digging.
What is the hardest part of installing a fence?
The hardest part of installing a fence is typically digging post holes. This task can be physically demanding, time-consuming, and requires precision to ensure the posts are set securely in place.